


Flowfast Pourable Repair Mortar is an easy-to-use, two part product. The liquid consistency allows the product to self-level, which only requires minimal trowelling, depending on the substrate.
Flowfast is a great product to use to infill holes and similar damaged areas, however it is not suitable or recommended for sloped floors, building levels or vertical surfaces.
During the repair process, we recommend wearing the correct PPE, such as coveralls, a safety mask and safety gloves, to protect your skin and prevent breathing in any hazardous fumes.
Step 1: Surface Preparation
- Break away and remove any loose surface material from the damaged area.
- Ensure the surface is clean, dry and free of any contaminants.
Note: Flowfast Repair Mortar can be applied to damp, but not wet, concrete.
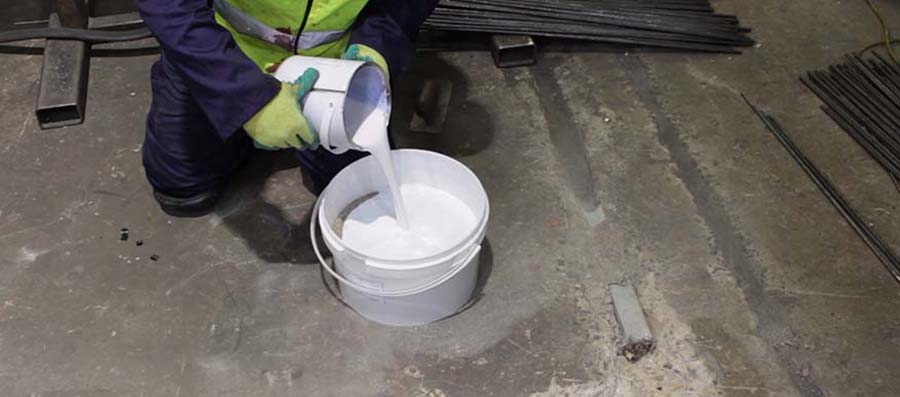
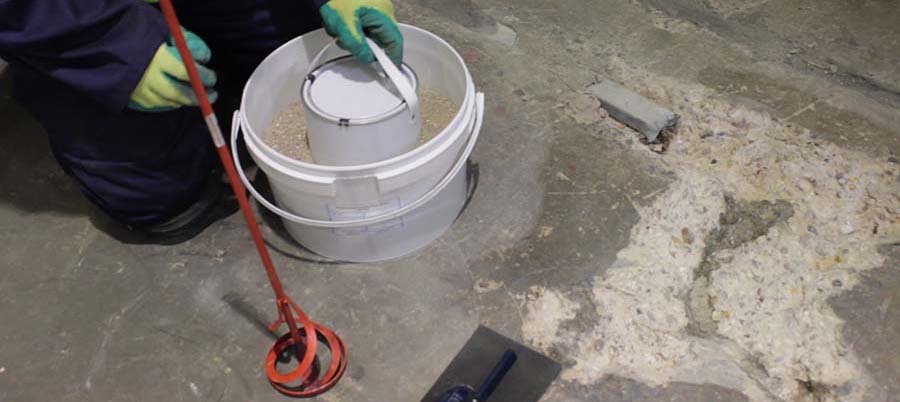
Step 2: Product Preparation
- Simply pour the resin contents into the aggregate container.
- Using a mixing paddle attached to a drill, mix the contents together to achieve an even colour and consistency.
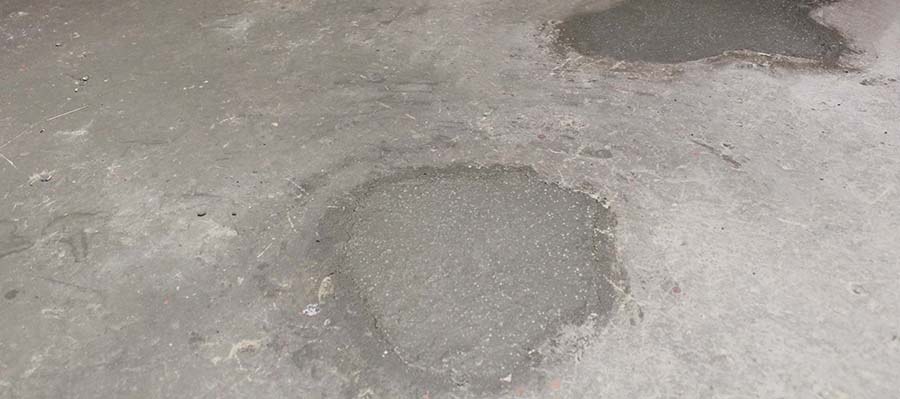
Note: Once the Mortar is mixed is it a purple colour, however the Mortar will cure to a dark grey colour, to suit most concrete floors.
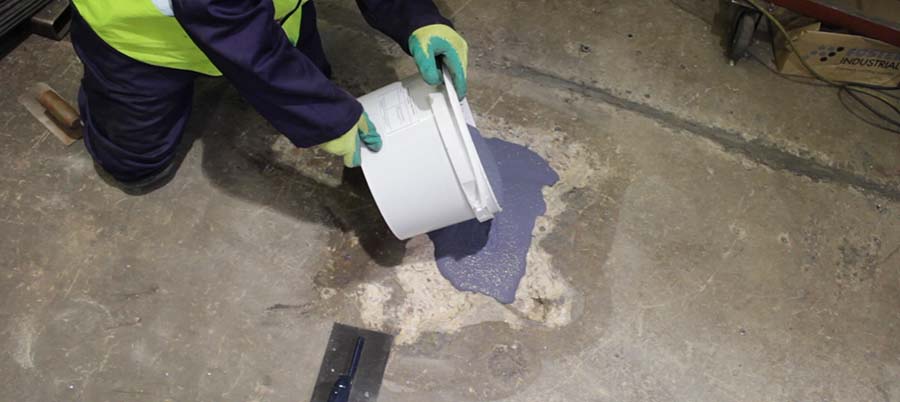
Step 3: Product Installation
- Pour the mixed Mortar into your damaged area immediately.
- Allow the Mortar to self-level.
- If necessary, use a trowel or steel float to smooth over the surface.
- To prevent drag on the Mortar and create a smooth finish, moisten a rag with Rizistal Safer Solvent and wipe it across the blade.
- Once finished, clean your tools with Rizistal Safer Solvent.
Note: The Mortar can be applied at a thickness of 10mm to 150mm in one application.
Step 4: Product Curing Time
- Foot traffic can be accepted after 1 hour at a temperature of 20°C.
- Heavy vehicular traffic can be accepted after 4 hours at a temperature of 20°C.
- For colder temperatures, please allow up to 12 – 24 hours to cure.
- The repaired area must be kept clean and dry for 12 – 18 hours otherwise the product performance can be affected, which may cause discolouration or lack of cure.